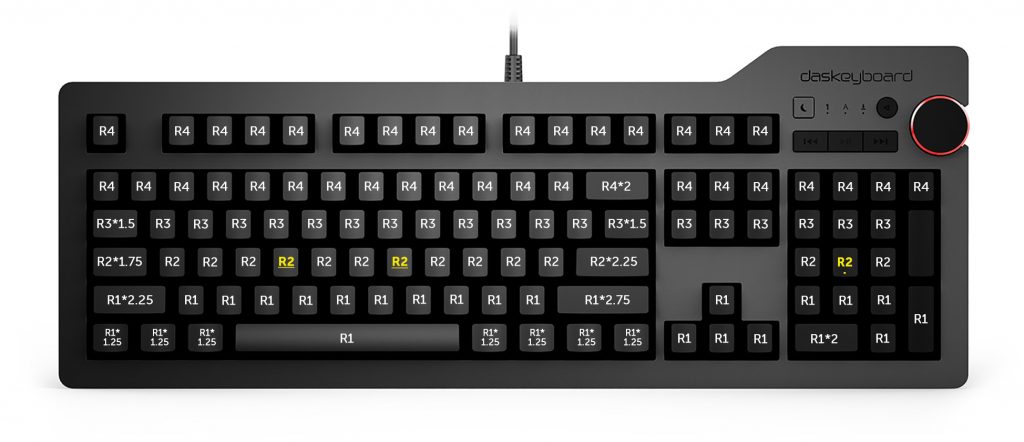
Because Das Keyboard Ultimate models have completely blank keycaps with no inscriptions, it can be challenging to reassemble them if they are not laid out perfectly when disassembled for cleaning. If you have accidentally disassembled your Das Keyboard Ultimate, have no fear, simply look on the inside of each keycap and use the below guide to put the blank keycaps in their proper placement.
This guide applies to the Das Keyboard Ultimate and Model S Ultimate.
- Function row: R4
- Number row: R4
- Top Letter Row: R3
- Middle Letter Row: R2
- Bottom Letter Row: R1
- Bottom Ctrl, Alt, Fn, Spacebar Row: R1
In the below image, the R1, R2, R3, and R4 will be the only markings on the inside of the keycaps, and the *1.XX refers to the size of the keycap in inches, and the yellow, underlined keys indicate a bump on the key.

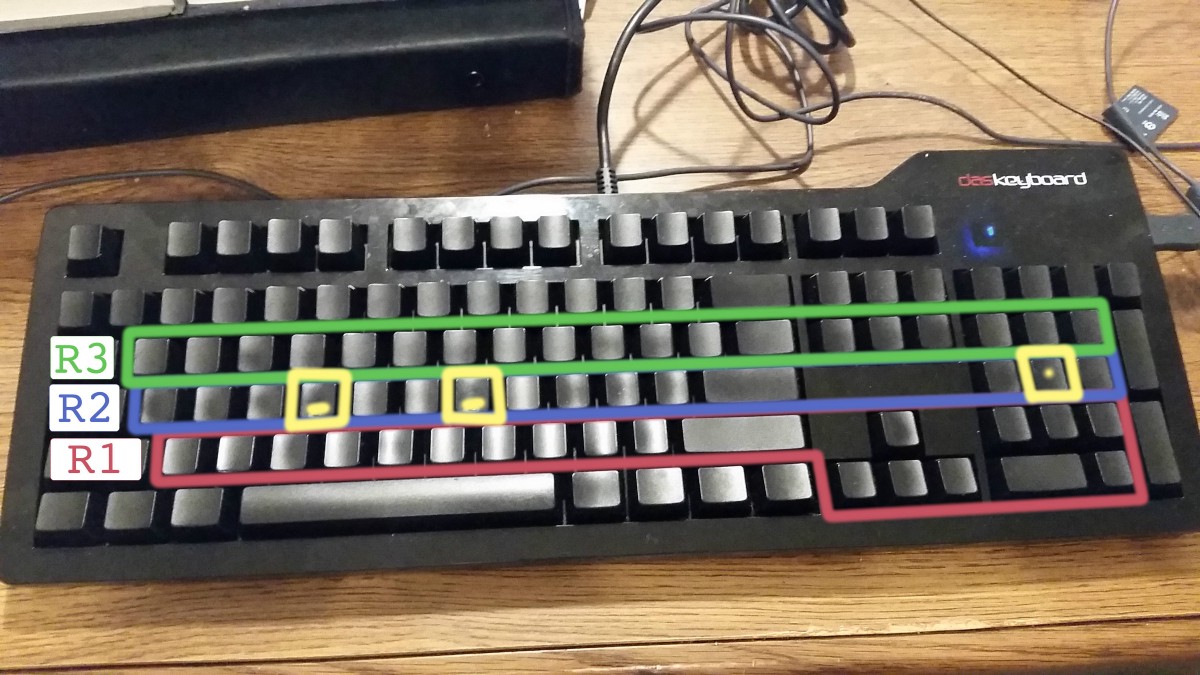
A member of the Das Keyboard community also created a helpful guide: Benjamin J DeLong.
I recently tried to clean my Das Keyboard, but got stuck at reassembly. Looking online, I found no solutions. I got some guidance from the Das team on Twitter, but no precise solutions. So I managed to piece it together myself.
From the above picture, you can see that there are keys with R1 for the first row, plus dpad and period on the numpad. R2 includes the numpad and the special keys (highlighted in yellow, embossed with dashes and a period respectively from left to right). R3 includes the Del, End, PgDn buttons, and the top of the numpad. All the other keys have various numbers written on the back, and as far as I can tell, can fill any of the remaining spots. The other differently shaped keys should be self-explanatory, or at least easy enough to figure out.

